Dutch Bucket System for Indoor Growing of cannabis
Benefits and Drawbacks of Indoor Growing with a Dutch Bucket Method
The advantages of using the Dutch bucket method for indoor growing
Detailed Instructions for Making and Using a Dutch Bucket System.
Essential Materials for Putting Together a Dutch Bucket System for Indoor Gardening
Dutch Bucket System for Indoor Growing of Cannabis
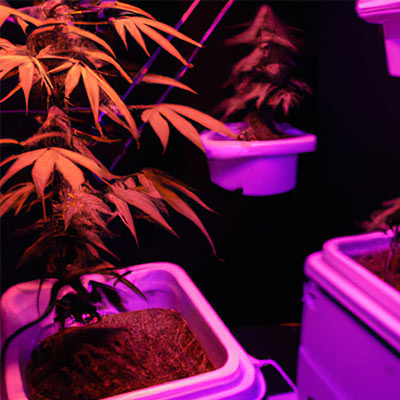
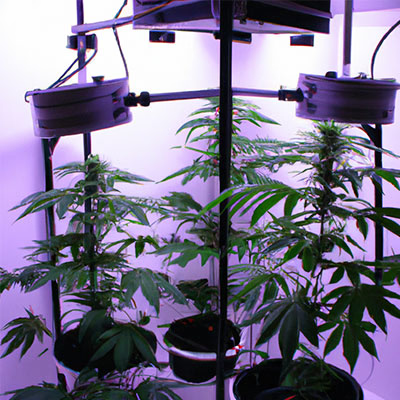
The Dutch bucket method is the best for growing high-yield, premium weed indoors. The Dutch bucket system, also called the Bato Pot system, is a cutting-edge technique for growing Cannabis indoors that has gained favor recently. With the help of plumbing fixtures, nutrient-rich solutions, and specially made buckets, or "pots," as commonly known, this hydroponic cultivation system creates a closed-loop environment ideal for plant development.
The Dutch Bucket System's fundamental parts include buckets, net containers, a drainage tray, and a reservoir or canister for the nutrient solution—Dutch Bucket System for Indoor Growing of cannabis. Every pot has a separate irrigation line connected to a shared water or nutrient solution supply in the reservoir below.
For water or nutrient solution to reach each plant's root zone evenly and effectively when filled with water or nutrient solution, these lines are connected through holes drilled into each side of the pot at various heights. The pots are then set on a drainage tray with slots so that any extra water or fertilizer solution can drain back into the reservoir without being taken out of the pots themselves.
In this closed-loop environment, feeding your plants is as simple as adding nutrients to your reservoir tank. Depending on the stage of growth your crop is in (vegetative growth requires higher levels, while flowering requires lower amounts), nutrients like nitrogen (N), phosphorous (P), and potassium (K) should be added at specific levels and thoroughly mixed before being distributed throughout all buckets via their respective irrigation lines.
Suppose you have enough space around each container within your setup. However, if space permits, it may be advantageous to dedicate separate tanks per container type to precisely control the pH balance within each pot/bucket setup when necessary. In that case, you can connect multiple buckets side by side, allowing them all access to one common source of nutrients.
Because of its open design compared to other hydroponic growing methods like NFT, this type of hydroponic growing is especially appealing because of its capacity to maintain constant moisture levels throughout its containers using only minimal energy inputs (Nutrient Film Technique).
It doesn't require complicated equipment like pumps, so it is ideal for small-scale backyard operations where a power source isn't always feasible. It's also very well suited to growing larger plants outdoors. However, one significant drawback is that because these containers lack adequate drainage outlets at their bases, any overflow must be manually collected underneath them, requiring more frequent maintenance than most current hydroponic setups.
Although this issue has largely been alleviated in recent years thanks to advancements like self-contained drain valves, it is still something to consider when determining whether this hydroponics style is right for you.
In conclusion, the Dutch Bucket System, also known as the Bato Pot System, is ideal for novice and experienced growers who don't mind putting in a little extra work to ensure success. If you're looking for an efficient means to cultivate high-quality Cannabis indoors without breaking the bank, look no further.
Benefits and Drawbacks of Indoor Growing with a Dutch Bucket Method
The Dutch bucket technique of indoor cannabis cultivation is well-liked and productive. With this technique, marijuana is grown in a succession of buckets filled with a nutrient-rich liquid. A pump attached to the buckets circulates the nutrient solution to the plant. This article will go into depth about the advantages and disadvantages of this method of cannabis cultivation.
The advantages of using the Dutch bucket method for indoor growing
Efficient Use of Space: Making efficient use of space is one of the primary benefits of Dutch bucket indoor cannabis cultivation. The buckets can be stacked on each other to make the most of the available room. As a result, it is the best technique for people with limited workspace.
Economical: The Dutch bucket technique is economical because it needs few tools and supplies. The containers themselves are reasonably priced and simple to find. Furthermore, the nutrient solution used in the device is also reasonably priced.
The Dutch bucket technique is also comparatively simple to keep. When necessary, the containers can be emptied and refreshed with nutrient solutions. For optimum development, the nutrient solution can also be tracked and modified.
High Yields: Lastly, it is well known that the Dutch bucket technique results in high yields of top-notch Cannabis. The nutrient solution ensures the plants get the proper nutrients in the precise quantities required for rapid development. This then results in bigger, more robust blooms.
Dutch bucket indoor growing has disadvantages.
Initial Setup Time: The Dutch bucket technique can take a while. It necessitates a thorough knowledge of the system and how to implement it correctly. This can be a daunting job for those unfamiliar with indoor growing.
Continuous Monitoring: The Dutch bucket technique also necessitates continuous system monitoring. The nutrient solution must be checked and adjusted frequently to guarantee optimum growth. In addition, as required, the buckets must be emptied and refreshed with nutrient solution.
Contamination Risk: Lastly, improper maintenance of the Dutch bucket technique can make it vulnerable to contamination. The plants may become disease-resistant if pathogens and bugs are present in the nutrient solution.
Conclusion
The Dutch bucket technique of indoor cannabis cultivation is efficient. This method has advantages like effective space use, low expense, simple maintenance, and high yields. Disadvantages include initial setup time, ongoing monitoring, and contamination risk. Whether to use this technique is ultimately up to the grower.
Detailed Instructions for Making and Using a Dutch Bucket System.
A Dutch bucket system is an automated hydroponic gardening arrangement that employs buckets or containers filled with nutrient-rich water and growing mediums like hydro-ton clay pebbles, perlite, or Rockwool cubes.
Hoses or pipes link the buckets that transfer nutrient-rich water from one bucket's reservoir to another's root zone. This form of hydroponic gardening enables growers to utilize small spaces effectively without compromising plant growth or yield potential.
Additionally, since there is no soil in the buckets and plants get their nutrients straight from the nutrient solution flowing through them, it lowers the risk of disease.
You can look further if you want detailed instructions on building and using your Dutch pail system. To get started, you'll need the following:
A substantial receptacle (an actual plastic storage bin works well).
Aeration tubing and an air compressor.
Use coco coir or planting mix as your growing substrate.
For drainage and aeration, use perlite or expanded clay particles.
A pH-balanced nutrient mix appropriate for your plants' requirements.
A timer that can, if desired, be used to regulate the cycles of nutrient distribution.
How To Build Up A Dutch Bucket System:
Gather your materials - You will need several five-gallon buckets (or larger), PVC pipe fittings like elbows and Ts, a pump with an appropriate power cord length (depending on the size of the system), air tubing, air stones/diffusers if desired, grow media such as Hydroton Clay Pebbles or Rockwool Cubes, etc., and pH test kit/monitor if desired—specifically designed nutrients and fertilizers for hydroponic setups.
Prepare the Buckets - Drill several holes near the top edge of each bucket lid. These holes will be used in Step 4 below to connect pipes. Next, make tiny square openings at each bucket's ends so that air tubing can be inserted later in Step 3 below.
Lastly, make a hole near the bottom edge of one end of each bucket. This hole will drain extra moisture from each bucket during maintenance procedures.
Install Air Tubing - Place pre-cut lengths of flexible air tubing into each little square opening created previously in Step 2 above. Before connecting the other ends of each tube to the air pump with the same type of connector, connect one end of each tube to an air stone or diffuser inside the corresponding buckets using the appropriate connectors and clamps (s). After adequately installing all tubes by the above plan, ensure all connections are firmly fastened.
Attach Pipes – By the original setup plan, attach two pieces of PVC pipe fittings (elbows & T's) to the lids drilled earlier in Step 1 above. Place the lid back on top of the corresponding five-gallon buckets once all pipes have been firmly fastened. Before continuing below, ensure all connections are fully sealed from the outside environment.
Add Grow Media - Add the selected grow media, such as Hydroton Clay Pebbles, Perlite, Rockwool Cubes, etc., to each five-gallon bucket until it is about halfway full. When correctly filling the corresponding ones, make sure any extra material is outside the specific receptacle.
Add Nutrient Solution - Blend the appropriate ratio fertilizer made for hydroponics systems by the manufacturer's directions before carefully pouring over the top layer of the growing medium already installed in the previous step. Continue until the liquid level reaches the bottom drainage hole made in the previous step.
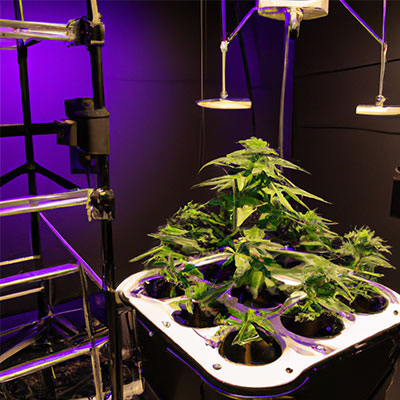
Connect Buckets - When all the components have been connected, the unified network circulation should resemble the shape of the "H" design diagram shown in the example picture. This is done by joining multiple individual five-gallon buckets together using the PVC piping assembly attached lids described in step four further up the page.
Activate Pump & Begin Growing- Plug the pump power cord into an outlet before turning the switch to the "on" position. This will allow the nutrient-rich solution to circulate slowly throughout the system, ensuring even distribution throughout every container part network and sufficient aeration of oxygenated root plants within various compartments.
Success. After completing these easy steps, you have everything you need to start growing your interior garden with the ground-breaking Dutch Bucket System. Keep in mind to keep an eye on your PH level and maintain a correct balance between acidity and alkalinity to ensure a healthy, active crop harvest season.
Essential Materials for Putting Together a Dutch Bucket System for Indoor Gardening
Indoor gardening can be a great way to grow your food and Cannabis right in the comfort of your home. But if you want to get serious about indoor gardening, one of the best ways to go is with a Dutch bucket system.
This method uses specially designed buckets explicitly developed for hydroponic growing. With a Dutch bucket system, you can easily create an efficient self-watering container garden indoors that requires minimal effort and maintenance but yields significant results.
But before you start setting up your Dutch bucket system for indoor gardening, it's essential to ensure you have all the necessary materials first. Here's our handy list of essential materials for putting together a Dutch Bucket System for indoor gardening:
Buckets – The buckets are the main component of any Dutch bucket system. Look for food-grade plastic buckets, as these are safe and non-toxic for growing edible crops such as Cannabis or vegetables inside them. Ensure each bucket has adequate drainage holes punched in its bottom and sides, so excess water doesn't accumulate at the bottom.
Air Pump – An air pump is used to oxygenate nutrient solutions during hydroponic cultivation. It helps keep plants healthy by delivering oxygen directly into their root zone, where it's most needed. A good quality air pump should last several years if cared for properly and maintained regularly. Invest in one that fits your budget and is reliable enough to handle heavy-duty usage over time.
Air Stones – These tiny stones are placed into water reservoirs connected to an air pump. They act like small diffusers, breaking down bubbles released from the air pump into finer particles. They then spread evenly throughout the nutrient solution to provide maximum oxygenation benefits to plants' root systems while minimizing clogging due to excessive bubble formation in tubing lines or other parts of hydro systems.
Tubing Lines - To connect air pumps with air stones (as well as other components), tubing lines come very handy since they allow users flexibility when arranging components according to their needs without worrying about incompatible sizes or shapes between different pieces of equipment. Make sure to pick up flexible yet durable types, preferably made out of PVC material avoid potential leakage problems down the line.
Nutrient Solution - A vital part of any successful hydroponic growth operation lies in proper nutrition delivered through the nutrient solution, which contains all the necessary minerals and elements for healthy plant growth, including nitrogen and phosphorus potassium. I don't know the original contents. Be sure to buy the highest quality possible from trusted sources. Know precisely what is going into plants, not just generic store-bought stuff.
Grow Medium - Traditional soil is often used outdoors not recommended indoors due to lack of drainage capabilities. instead, use some inert medium such as Rockwool, perlite, coco coir, clay pebbles, etc. these will hold moisture and absorb nutrients keeping everything nice and balanced without the risk of over-watering, drowning roots
pH Meter - To ensure optimal performance, every crop grown using this method must monitor closely, particularly regarding pH levels, since slight fluctuations in either direction could spell an entire disaster crop. Thus, having meter hand check levels is always a wise choice, even more critical when dealing with sensitive species like Cannabis.
Timers – Finally, timers become crucial, especially for those who want to automate their whole setup timers help regulate light cycles, irrigation schedules temperature settings and ensure optimal conditions are created and maintained throughout the course entire growth cycle, thus making lives much more accessible and allowing growers to focus on tasks other than constantly monitoring the environment manually
With all these essential materials ready, you're set to assemble your Dutch Bucket System for Indoor Gardening! All it takes is patience and dedication, but once done correctly, you'll be rewarded with excellent harvests yearly.